Setup
Here you'll learn how to set up the source and a visual studio project.
Building
Supported compilers:
VS2022 and above. Uses C17 and C++17.
Prerequisites
This package must be installed on the end-users machine for the engine to run properly.

Credit
You can use any of the provided images and logos to credit the engine. This is completely voluntary and not legally required, though I would appreciate the credit.
Please note that the LICENSE must be included with every copy of your application.

Source project
After executing BUILD.bat, simply open NGE.sln to open the project in visual studio.
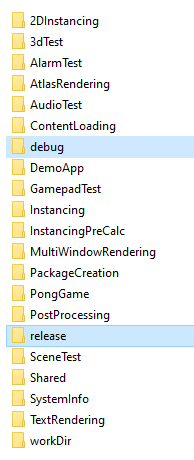
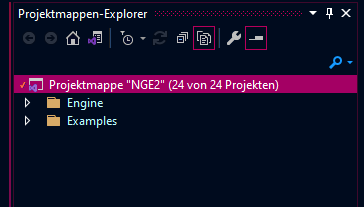
You will see two folders. One labeled Engine, which holds all core engine libraries.
The other one named Examples holds all the example projects.
Simply right click on the solution and choose build solution. This shouldn't take long.
After you have successfully compiled the engine you should try to run one of the examples to see if everything is working correctly.
You are now ready to create your own project!
Creating a new Project
I highly suggest simply copying the DemoApp example project to get started.
You should also copy workDir.
Correct linking
Don't forget to correctly link your project to the engine files.
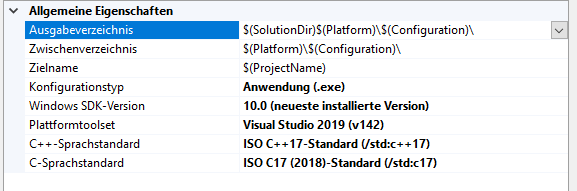
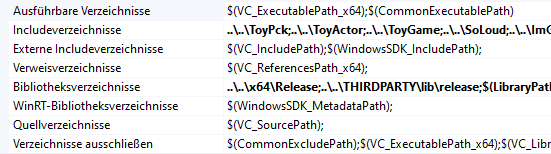
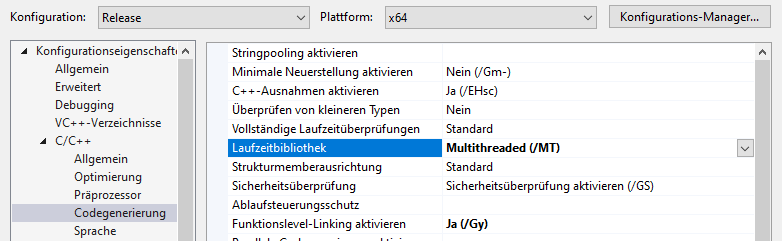
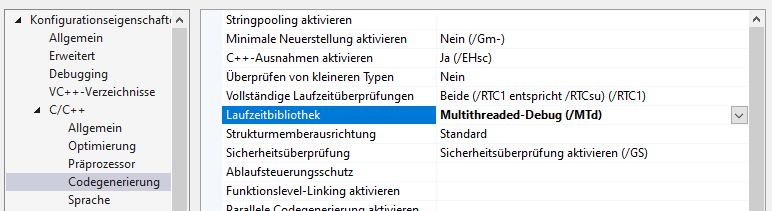
The engine requires its libraries to be Multithreaded (/MT) and Multithreaded-Debug (/MTd).
Working Directory
You can structure your application any way you like, with a few exceptions.
In order for the shader manager to work properly you should have the shader compiler shaderc.exe as well as a folder called development, including all your shader source files, inside your working directory.
The compiled shader files will appear inside the folder labeled shaders.
It is not required to ship your application with shaderc.exe or development.
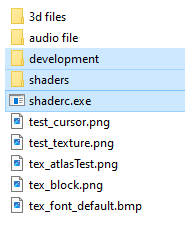
The required dynamic libraries are stored inside of debug and release.